Skram is a Burlington, North Carolina based furniture company founded by A. Jacob Marks that focuses on sustainable methods of manufacturing. Their goal is to design and produce quality, handcrafted pieces that can be handed down from generation to generation and it’s clear when you take a look at what goes into making the Altai Side Table. For this month’s Deconstruction, Skram takes us behind the scenes to see how this beautiful table comes to light. Take a look.
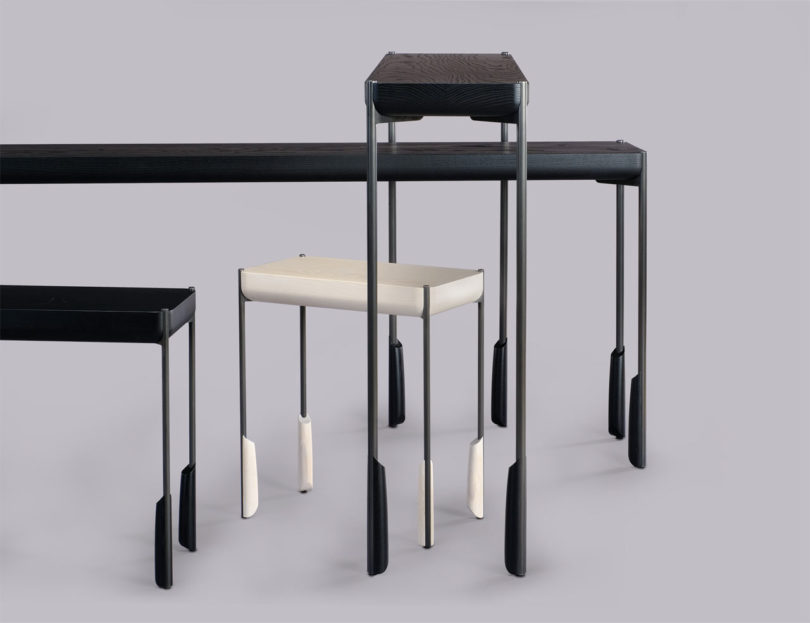
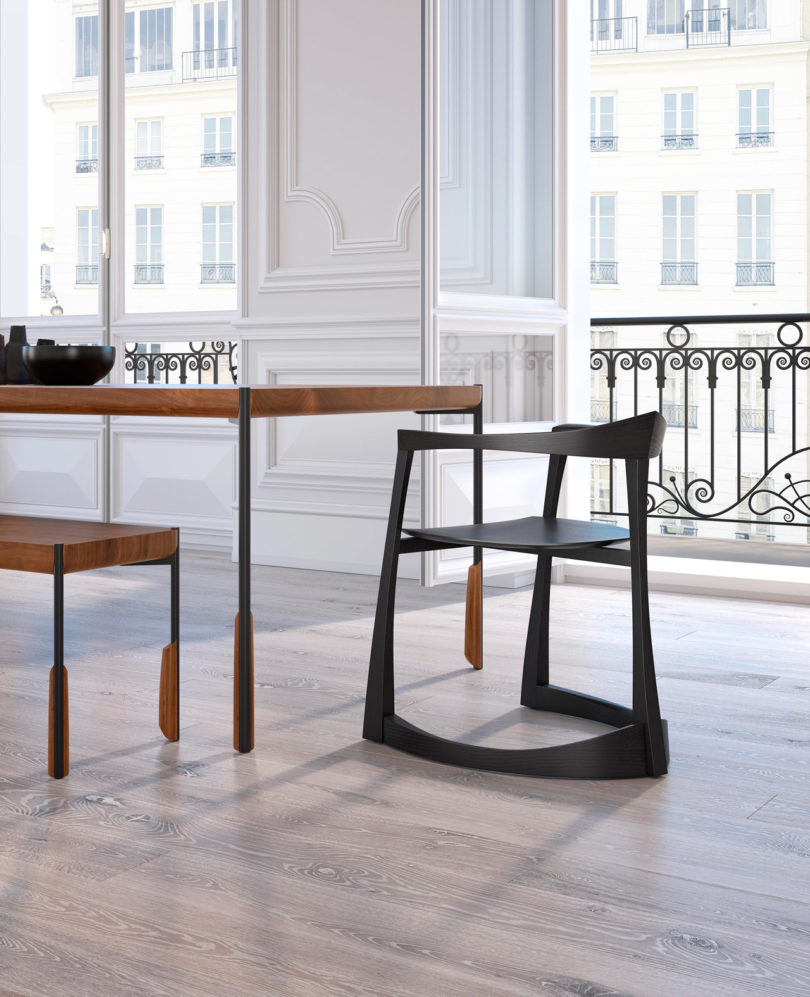
Altai is a family of seating and tables that we launched in 2015. The defining characteristic of this body of work is what we call the leg element (others have said that they look like leg warmers or rifle barrels or any number of other things), which we manifest with a complex computer-driven carving process and a great deal of hand work.
Altai was our first collection that embraced applied ornament (in the form of the leg element) – something not structurally necessary – which was a big deal for a devoted minimalist. But the visual weight created by the leg element was aesthetically necessary and, we felt, really beautiful, tactile, and strong.
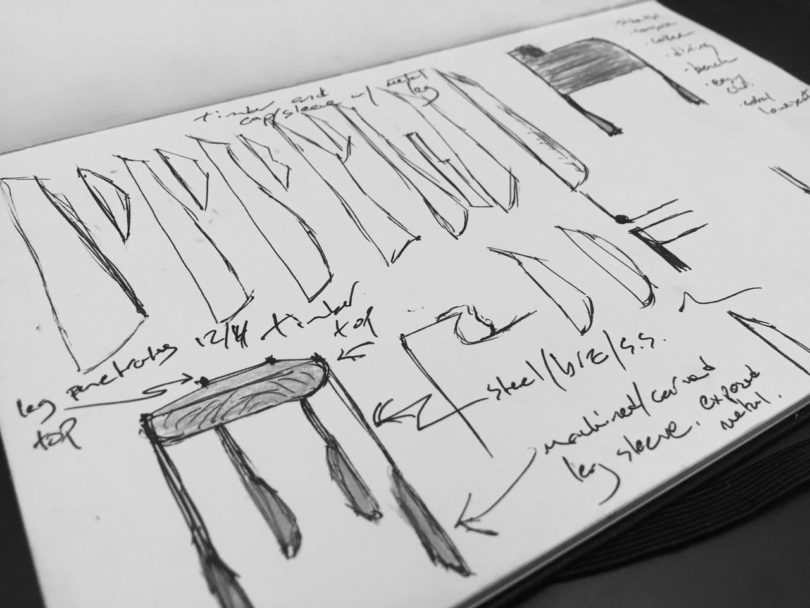
Sketches, renderings, and concept development: This is the first reference in my sketchbook for the forms that became Altai. After this stage, the design process goes directly to the computer, where we work out details, produce 3D models, and do renderings. Eventually we will export from our modeling program to our CAM software, which is what is used to program our router. But still, the sketchbook is essential. It all begins with a line on a white page.
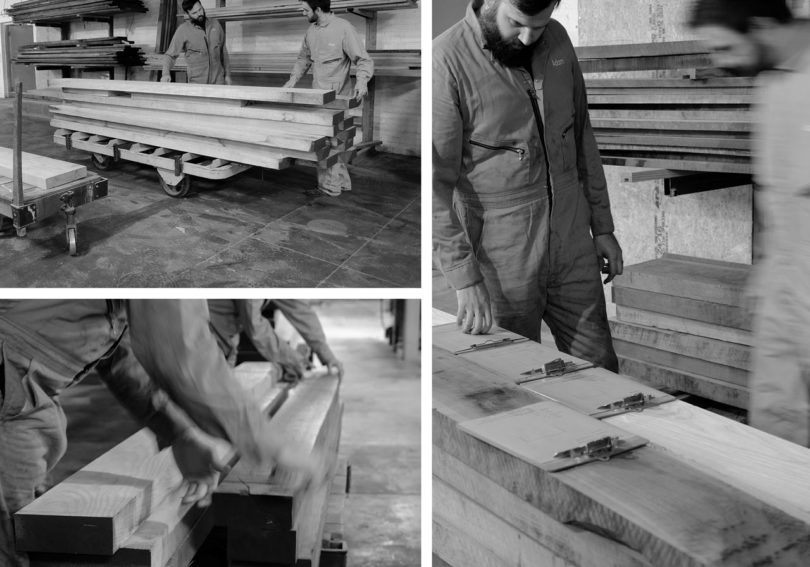
Rough Milling: Timber Selection: Fabrication begins with work orders being pulled and grouped as determined by our product schedule. In this case, we are following the fabrication of a few sets of Altai Side Tables and several Altai Console Tables. In these images the 3” thick White Ash and Walnut rough sawn timber that will make up the table tops are being selected and sorted. Our timber comes from Appalachian forests within a few hundred miles of our facility.
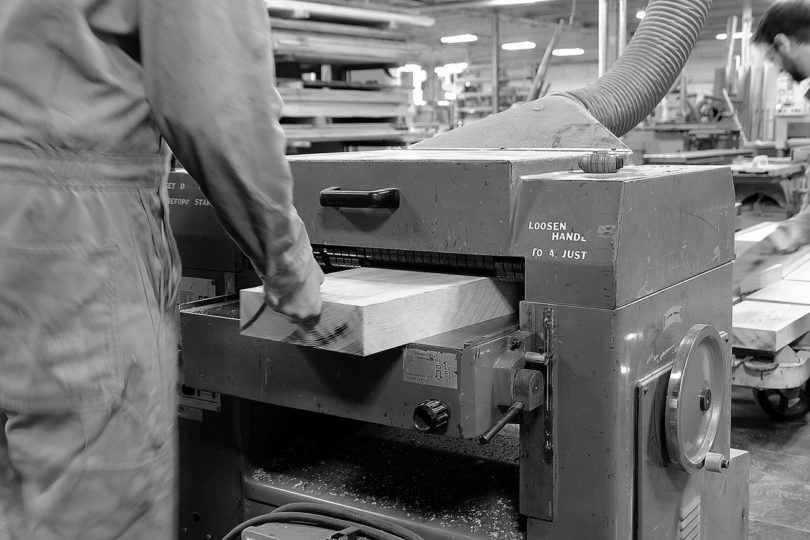
Rough Milling: Face Joint and Plane: After material is selected, we cut it to a rough length in order to ease handling and to get the best yield and presentation. Then we create a flat surface on one face of the timber using the jointer and create a parallel surface using the planer.
Rough Milling: Straightline: After planing, the parts are moved to the SLR saw for a process called ‘straightlining’. This 70 year old machine rips perfect edges on the material, to prepare the boards for gluing into tops.
Rough Milling: Glue-Up: Now we assemble the blanks for the tops. We use a non-toxic, rigid and permenent adhesive for this. The tops go into a large panel clamp. They will cure and stabilize for at least 24 hours before further processing.
Rough Milling: Sanding: After curing, the tops have been removed from the clamp and regrouped with the wide blanks that did not require assembly. They are passed through a precise sander with 2 heads, one for 120 grit and one for 180 grit. They are thicknessed to exactly 2.5”.
*Solar: By the way, the machines that you see in these images are powered by the sun.
CNC: Leg Element Carving. At the CNC router, the leg element blanks have been prepared and are ready for carving. The blanks are made to yield complete sets so that they match in grain and character. Here is a video showing the machining and carving process on a set of the small 7” legs that we use for the Altai Side Tables. Leg elements scale up for the larger products in the Altai Family, with the largest being 12” high.
CNC: Top Matching: Altai tops are machined upside down on the CNC. Here is a video of a Side Table top being machined. These smaller tops use a dedicated vacuum fixture to focus the vacuum and hold the part securely. The larger tops do not require a dedicated fixture.
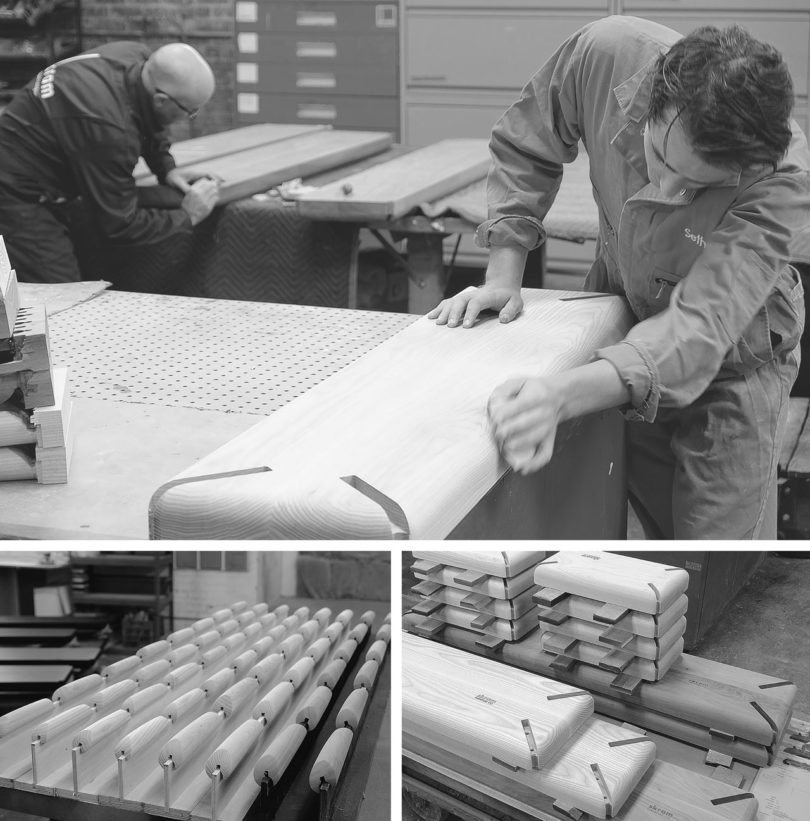
Leg Element Separation and Sanding: After machining, the leg elements travel to the bandsaw and edge sander for separation and initial sanding to remove tool marks. These parts will go into the sanding department for final preparation and then join the tops in wood finishing.
Sanding: The tops and leg elements have been sanded and are now ready for finishing.
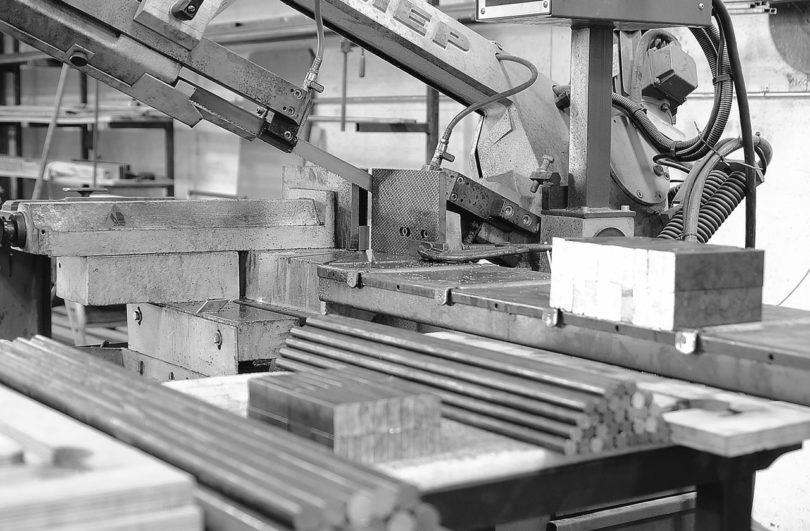
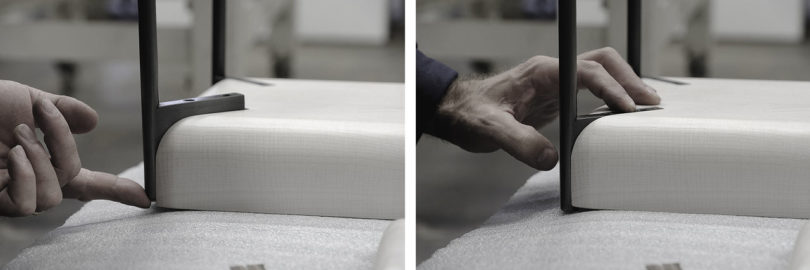
Meanwhile, in the Metal Department, we fabricate the legs for these orders. Altai legs consist of three parts: flag, pole, and locating pin. The following images show some of the steps involved in the fabrication of these parts. This Altai metalwork will receive our Gunmetal patinized finish. Altai metalwork is also offered in: opaque matte black, white, charcoal or custom and in brushed stainless steel, natural brushed bronze, and dark-rubbed bronze.
Fabrication: When all machining and pre-assembly surface preparation is complete, the leg parts are placed in fixtures and welded.
Surface Preparation: Assembled legs are ground, sanded and cleaned to prepare the surfaces for the Gunmetal patina finish. Now the metalwork is ready for finishing.
Wood and metal finishing: In the finishing area we process some of the Altai Side Tables in an Ebonized finish and the rest in our Whitewashed finish. Both of these finishes have several steps to achieve the correct effect, but the final step is the application of several coats of a clear, contract grade, GreenGuard certified conversion varnish.
The Gunmetal finish that we offer is a ‘character grade’ finish. Unlike our opaque urethane finishes which are monolithic in their appearance and show no variation of any kind, our gunmetal patina is intended to reveal subtle glimpses of the maker’s hand. This finish is time-consuming, as it is hand-applied and worked into the surface of the metal. Once the correct tone is achieved, each part is individually rubbed-back, or burnished, to expose ‘highlights’ of the metal through the patina. After that step, the legs are lacquered and waxed and are ready for final assembly.
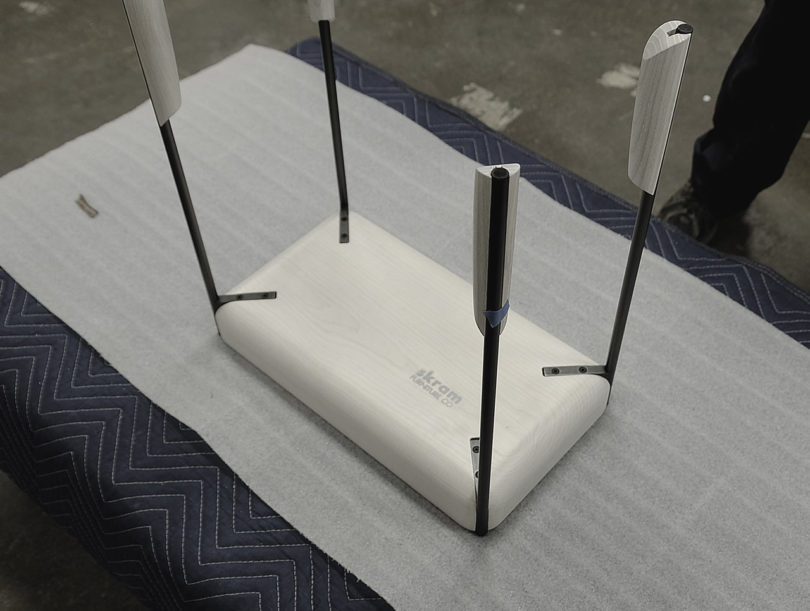
Final staging and assembly: Here, we are doing final assembly on these tables in our staging area, which is the last stop before final inspection and crating. During this stage, the legs are first inserted into the taps and are secured. Then the leg elements are installed. They are an extremely tight tolerance relative to the metalwork. They are slid over the metal, rotated into position and engaged with the locating pin on the inside of the leg.
The final product assembled.
from Design MilkDesign Milk http://design-milk.com/the-design-and-manufacturing-process-of-skrams-altai-side-table/





No comments:
Post a Comment